
A Jenkins telepítési útmutató lépésről lépésre.
Ebből a cikkből megtudjuk, hogyan telepíthető a Jenkins a következő operációs rendszerekre.
Az összes fenti operációs rendszer esetében a Jenkins telepítési lépései kissé eltérnek, de a konfigurációs lépések ugyanazok.
Mi az a Jenkins?
Jenkins egy nyílt forráskódú automatizálás-építő eszköz a fejlesztők számára a projektek és alkalmazások körbefutásához. Szoftverek és alkalmazások építésére és telepítésére használják. Ez egy hatékony automatizálási alkalmazás, amely lehetővé teszi a projektek folyamatos integrációját és folyamatos szállítását, függetlenül attól, hogy milyen platformon dolgozik.
Mivel a Jenkins egy Java alkalmazás, minden olyan gépen önállóan fut, amelyre Java Runtime Environment (JRE) van telepítve.
Ha Jenkinst szeretne tanulni, nézze meg ezt online tanfolyam nulláról hőssé válni.
Tartalomjegyzék
Előfeltétel
A JDK8+ minden operációs rendszerhez kötelező. Tehát először telepítenünk kell a JDK8 vagy újabb verziót. Letöltheti és telepítheti innen.
Jenkins telepítés Windows rendszeren
A JDK telepítése és futtatása után készen állunk a Jenkins letöltésére és telepítésére. Kattintson itt a legújabb Jenkins MSI csomag letöltéséhez Windows rendszerhez.
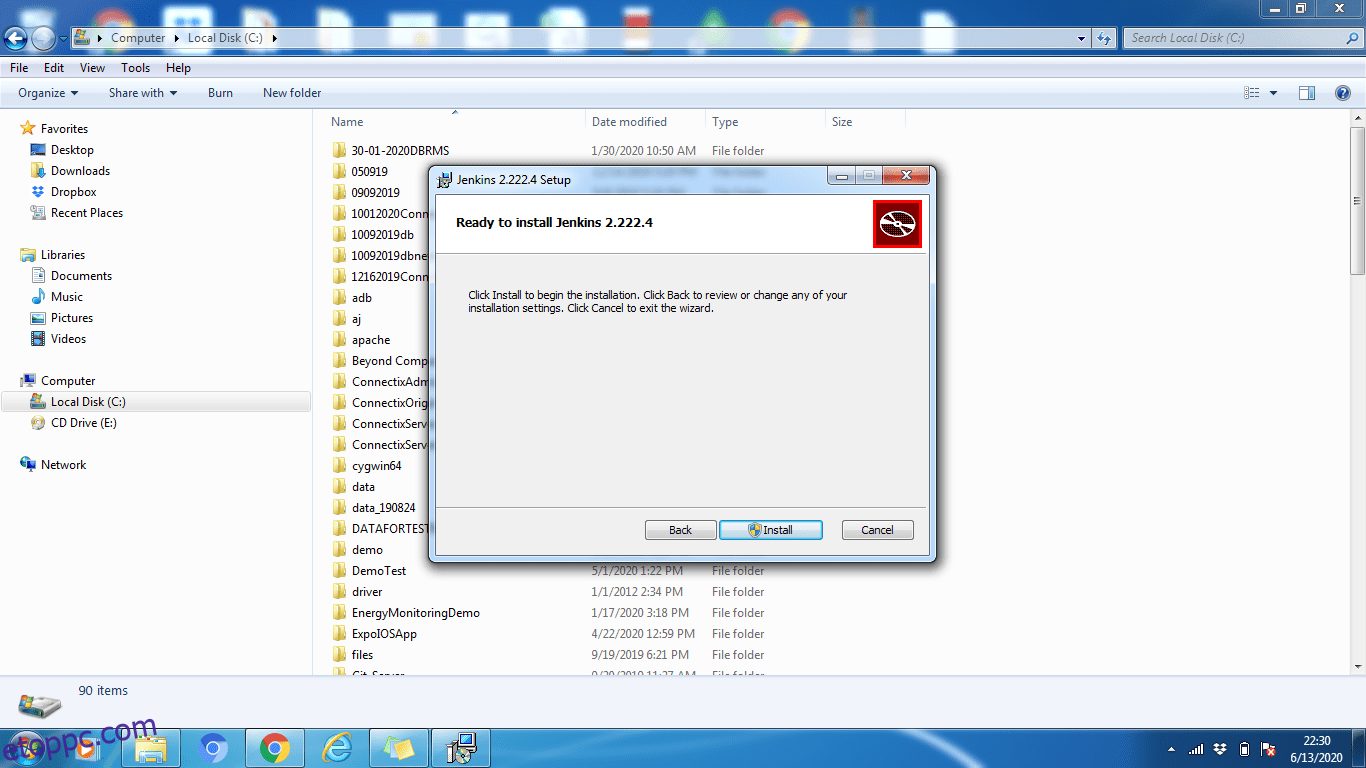
- Kattintson duplán a jenkins.msi fájlra a telepítés megkezdéséhez.
- Kattintson a Tovább gombra, majd telepítse

- Kattintson a Módosítás gombra, ha másik könyvtárba szeretné telepíteni. Ebben a példában megtartjuk az alapértelmezett beállítást, kattintson a Tovább gombra

- Ha végzett a telepítési folyamattal, kattintson a Befejezés gombra a telepítés befejezéséhez.
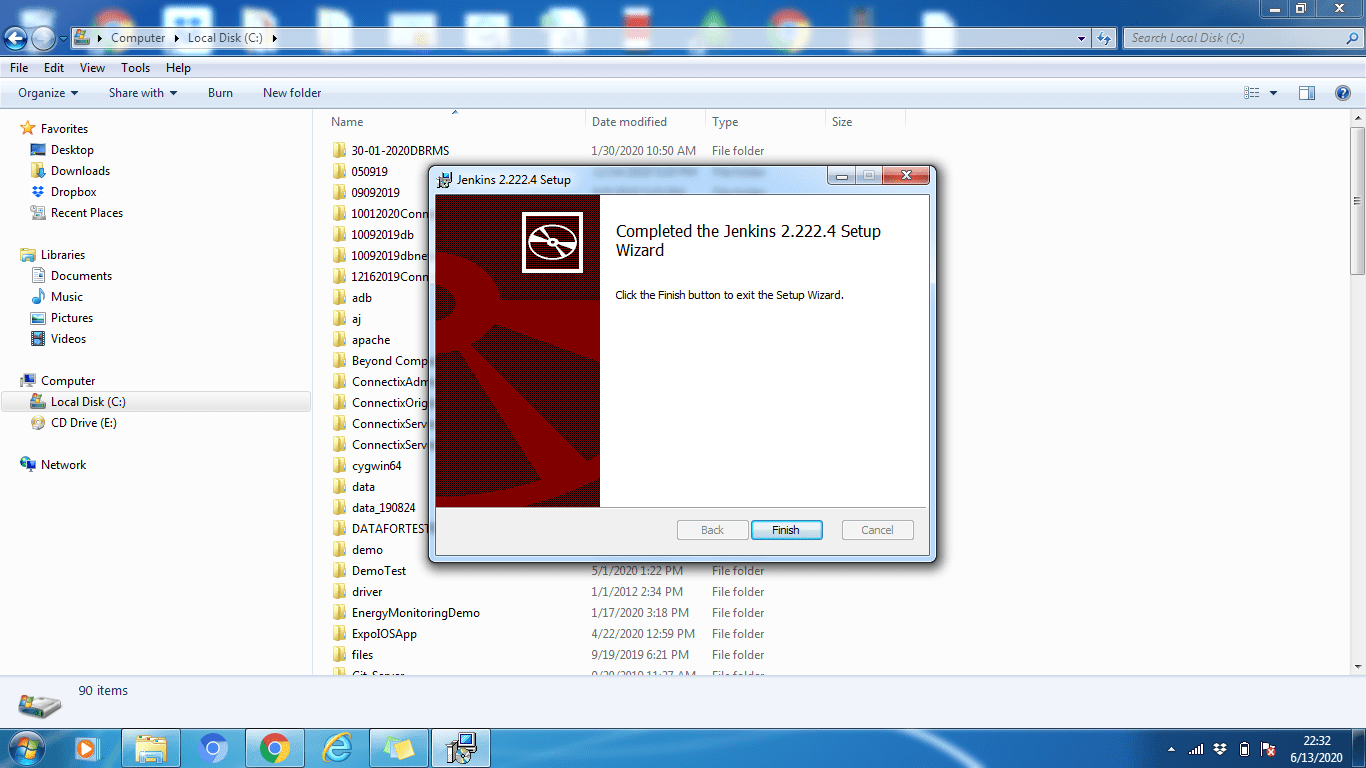
Amint láthatja, a Jenkins telepítése a Windows rendszerben nagyon egyszerű. Csakúgy, mint bármely más szabványos szoftver.
Jenkins telepítés Ubuntura
Ahogy korábban említettük, győződjön meg arról, hogy a JDK8+ telepítve van és fut az Ubuntu gépen. Ha nincs telepítve, hajtsa végre az alábbi parancsot a telepítéshez.
sudo apt install default-jdk-headless
[email protected]:~$ sudo apt install default-jdk-headless
Reading package lists... Done
Building dependency tree
Reading state information... Done
The following NEW packages will be installed:
  default-jdk-headless
0 upgraded, 1 newly installed, 0 to remove and 102 not upgraded.
Need to get 1132 B of archives.
After this operation, 6144 B of additional disk space will be used.
Get:1 http://archive.ubuntu.com/ubuntu bionic-updates/main amd64 default-jdk-headless amd64 2:1.11-68ubuntu1~18.04.1 [1132 B]
Fetched 1132 B in 2s (676 B/s)
Selecting previously unselected package default-jdk-headless.
(Reading database ... 30061 files and directories currently installed.)
Preparing to unpack .../default-jdk-headless_2%3a1.11-68ubuntu1~18.04.1_amd64.deb ...
Unpacking default-jdk-headless (2:1.11-68ubuntu1~18.04.1) ...
Setting up default-jdk-headless (2:1.11-68ubuntu1~18.04.1) ...
[email protected]:~$
A Java sikeres telepítésének ellenőrzéséhez hajtsa végre az alábbi parancsot:
java -verzió
[email protected]:~$ java -version
openjdk version "11.0.7" 2020-04-14
OpenJDK Runtime Environment (build 11.0.7+10-post-Ubuntu-2ubuntu218.04)
OpenJDK 64-Bit Server VM (build 11.0.7+10-post-Ubuntu-2ubuntu218.04, mixed mode, sharing)
[email protected]:~$
Ha már telepítve van, akkor kezdhetjük a Jenkins telepítését.
Telepítési lépések:
1. lépés: Először nyissa meg a parancsterminált (Ctrl + Alt + T)
2. lépés: A Jenkins telepítéséhez adjunk hozzá tárolókulcsot a rendszerhez
wget -q -O – http://pkg.jenkins-ci.org/debian/jenkins-ci.org.key | sudo apt-key add –
[email protected]:~$ wget -q -O - http://pkg.jenkins-ci.org/debian/jenkins-ci.org.key | sudo apt-key add -
OK
[email protected]:~$
3. lépés: A kulcs hozzáadása után hozzá kell fűznünk a Debian csomag repos címét a géphez.
sudo sh -c ‘echo deb http://pkg.jenkins-ci.org/debian-stable binary/ > /etc/apt/sources.list.d/jenkins .list’
4. lépés: Most frissítse az Ubuntu csomagokat
sudo apt frissítés
[email protected]:~$ sudo apt update
Hit:1 http://archive.ubuntu.com/ubuntu bionic InRelease
Get:2 http://archive.ubuntu.com/ubuntu bionic-updates InRelease [88.7 kB]
Ign:3 http://pkg.jenkins-ci.org/debian-stable binary/ InRelease
Get:4 http://pkg.jenkins-ci.org/debian-stable binary/ Release [2044 B]
Get:5 http://pkg.jenkins-ci.org/debian-stable binary/ Release.gpg [195 B]
Get:6 http://archive.ubuntu.com/ubuntu bionic-backports InRelease [74.6 kB]
Get:7 http://archive.ubuntu.com/ubuntu bionic/universe amd64 Packages [8570 kB]
Get:8 http://pkg.jenkins-ci.org/debian-stable binary/ Packages [17.6 kB]
Get:9 http://security.ubuntu.com/ubuntu bionic-security InRelease [88.7 kB]
Get:10 http://security.ubuntu.com/ubuntu bionic-security/main amd64 Packages [748 kB]
Get:11 http://security.ubuntu.com/ubuntu bionic-security/main Translation-en [237 kB]
Get:12 http://security.ubuntu.com/ubuntu bionic-security/restricted amd64 Packages [50.8 kB]
Get:13 http://security.ubuntu.com/ubuntu bionic-security/restricted Translation-en [12.3 kB]
Get:14 http://security.ubuntu.com/ubuntu bionic-security/universe amd64 Packages [673 kB]
Get:15 http://security.ubuntu.com/ubuntu bionic-security/universe Translation-en [223 kB]
Get:16 http://security.ubuntu.com/ubuntu bionic-security/multiverse amd64 Packages [7808 B]
Get:17 http://security.ubuntu.com/ubuntu bionic-security/multiverse Translation-en [2856 B]
Get:18 http://archive.ubuntu.com/ubuntu bionic/universe Translation-en [4941 kB]
Get:19 http://archive.ubuntu.com/ubuntu bionic/multiverse amd64 Packages [151 kB]
Get:20 http://archive.ubuntu.com/ubuntu bionic/multiverse Translation-en [108 kB]
Get:21 http://archive.ubuntu.com/ubuntu bionic-updates/main amd64 Packages [969 kB]
Get:22 http://archive.ubuntu.com/ubuntu bionic-updates/main Translation-en [329 kB]
Get:23 http://archive.ubuntu.com/ubuntu bionic-updates/restricted amd64 Packages [60.5 kB]
Get:24 http://archive.ubuntu.com/ubuntu bionic-updates/restricted Translation-en [14.7 kB]
Get:25 http://archive.ubuntu.com/ubuntu bionic-updates/universe amd64 Packages [1085 kB]
Get:26 http://archive.ubuntu.com/ubuntu bionic-updates/universe Translation-en [337 kB]
Get:27 http://archive.ubuntu.com/ubuntu bionic-updates/multiverse amd64 Packages [15.9 kB]
Get:28 http://archive.ubuntu.com/ubuntu bionic-updates/multiverse Translation-en [6420 B]
Get:29 http://archive.ubuntu.com/ubuntu bionic-backports/main amd64 Packages [7516 B]
Get:30 http://archive.ubuntu.com/ubuntu bionic-backports/main Translation-en [4764 B]
Get:31 http://archive.ubuntu.com/ubuntu bionic-backports/universe amd64 Packages [7484 B]
Get:32 http://archive.ubuntu.com/ubuntu bionic-backports/universe Translation-en [4436 B]
Fetched 18.8 MB in 58s (327 kB/s)
Reading package lists... Done
Building dependency tree
Reading state information... Done
102 packages can be upgraded. Run 'apt list --upgradable' to see them.
[email protected]:~$
5. lépés: Végül a Jenkins telepítéséhez hajtsa végre az alábbi parancsot
sudo apt install jenkins
[email protected]:~$ sudo apt install jenkins
Reading package lists... Done
Building dependency tree
Reading state information... Done
The following additional packages will be installed:
  daemon
The following NEW packages will be installed:
  daemon jenkins
0 upgraded, 2 newly installed, 0 to remove and 102 not upgraded.
Need to get 65.7 MB of archives.
After this operation, 66.8 MB of additional disk space will be used.
Do you want to continue? [Y/n] Y
Get:1 http://archive.ubuntu.com/ubuntu bionic/universe amd64 daemon amd64 0.6.4-1build1 [99.5 kB]
Get:2 http://pkg.jenkins-ci.org/debian-stable binary/ jenkins 2.235.1 [65.6 MB]
Fetched 65.7 MB in 3min 34s (307 kB/s)
Selecting previously unselected package daemon.
(Reading database ... 29242 files and directories currently installed.)
Preparing to unpack .../daemon_0.6.4-1build1_amd64.deb ...
Unpacking daemon (0.6.4-1build1) ...
Selecting previously unselected package jenkins.
Preparing to unpack .../jenkins_2.235.1_all.deb ...
Unpacking jenkins (2.235.1) ...
Setting up daemon (0.6.4-1build1) ...
Setting up jenkins (2.235.1) ...
invoke-rc.d: could not determine current runlevel
Processing triggers for systemd (237-3ubuntu10.39) ...
Processing triggers for man-db (2.8.3-2ubuntu0.1) ...
Processing triggers for ureadahead (0.100.0-21) ...
[email protected]:~$
Jenkins sikeresen telepítve. Most elindíthatjuk a Jenkins szervert.
6. lépés: A Jenkins indítása a systemctl paranccsal
sudo systemctl start jenkins
A systemctl nem jeleníti meg a kimenetet, így az alábbi paranccsal ellenőrizhetjük az állapotot. Ezzel a paranccsal ellenőrizhetjük, hogy Jenkins aktív-e vagy sem.
sudo systemctl status jenkins
[email protected]:~$ sudo systemctl status jenkins
● jenkins.service - LSB: Start Jenkins at boot time
   Loaded: loaded (/etc/init.d/jenkins; generated)
   Active: active (exited) since Sat 2020-04-04 10:10:19 UTC; 2 months 16 days ago
     Docs: man:systemd-sysv-generator(8)
    Tasks: 0 (limit: 4915)
   CGroup: /system.slice/jenkins.service

Apr 04 10:10:18 ip-172-31-17-25 systemd[1]: Starting LSB: Start Jenkins at boot time...
Apr 04 10:10:18 ip-172-31-17-25 jenkins[1984]: Correct java version found
Apr 04 10:10:18 ip-172-31-17-25 jenkins[1984]:  * Starting Jenkins Automation Server jenkins
Apr 04 10:10:18 ip-172-31-17-25 su[2037]: Successful su for root by root
Apr 04 10:10:18 ip-172-31-17-25 su[2037]: + ??? root:root
Apr 04 10:10:18 ip-172-31-17-25 su[2037]: pam_unix(su:session): session opened for user root by (uid=0)
Apr 04 10:10:18 ip-172-31-17-25 jenkins[1984]: mesg: ttyname failed: Inappropriate ioctl for device
Apr 04 10:10:18 ip-172-31-17-25 su[2037]: pam_unix(su:session): session closed for user root
Apr 04 10:10:19 ip-172-31-17-25 jenkins[1984]:    ...done.
Apr 04 10:10:19 ip-172-31-17-25 systemd[1]: Started LSB: Start Jenkins at boot time.
[email protected]:~$
6. lépés: Port konfigurálása (opcionális)
Alapértelmezés szerint a Jenkins 8080-as porton fut, és ezt a portot bárhonnan elérhetővé kell tennünk (ha nem elérhető).
Nyissuk meg a portot:
sudo ufw enable 8080
A következő paranccsal ellenőrizhetjük a port állapotát:
sudo ufw állapot
[email protected]:~$ sudo ufw status
Status: active
To           Action           From
--           ------           ----
8080         ALLOW            Anywhere
8080 (v6)    ALLOW            Anywhere (v6)
[email protected]:~$
Ha a tűzfal inaktív állapota látható, futtassa a következő parancsot, különben nem szükséges
sudo ufw engedélyezi az OpenSSH-t
követi
sudo ufw enable
Jenkins telepítés a CentOS rendszeren
Először győződjön meg arról, hogy a JDK8+ telepítve van és fut a gépen. Ha nincs telepítve, hajtsa végre az alábbi parancsot az OpenJDK 8 csomag telepítéséhez.
sudo yum install java-1.8.0-openjdk-devel
[[email protected] ~]$ sudo yum install java-1.8.0-openjdk-devel
CentOS-8 - AppStream                            1.0 kB/s | 4.3 kB     00:04
CentOS-8 - AppStream                            397 kB/s | 5.8 MB     00:14
CentOS-8 - Base                                 3.5 kB/s | 3.9 kB     00:01
CentOS-8 - Extras                               547  B/s | 1.5 kB     00:02
Jenkins-stable                                  6.5 kB/s | 2.9 kB     00:00
Dependencies resolved.
================================================================================
 Package                   Arch    Version                     Repository  Size
================================================================================
Installing:
 java-1.8.0-openjdk-devel  x86_64  1:1.8.0.252.b09-3.el8_2     AppStream  9.8 M

Transaction Summary
================================================================================
Install  1 Package

Total download size: 9.8 M
Installed size: 41 M
Is this ok [y/N]: y
Downloading Packages:
java-1.8.0-openjdk-devel-1.8.0.252.b09-3.el8_2. 531 kB/s | 9.8 MB     00:18
--------------------------------------------------------------------------------
Total                                           507 kB/s | 9.8 MB     00:19
Running transaction check
Transaction check succeeded.
Running transaction test
Transaction test succeeded.
Running transaction
  Preparing        :                                                        1/1
  Installing       : java-1.8.0-openjdk-devel-1:1.8.0.252.b09-3.el8_2.x86   1/1
  Running scriptlet: java-1.8.0-openjdk-devel-1:1.8.0.252.b09-3.el8_2.x86   1/1
  Verifying        : java-1.8.0-openjdk-devel-1:1.8.0.252.b09-3.el8_2.x86   1/1
Installed products updated.

Installed:
  java-1.8.0-openjdk-devel-1:1.8.0.252.b09-3.el8_2.x86_64

Complete!
[[email protected] ~]$
A Java sikeres telepítésének ellenőrzéséhez hajtsa végre az alábbi parancsot
java -version
[[email protected] ~]$ java -version
openjdk version "1.8.0_252"
OpenJDK Runtime Environment (build 1.8.0_252-b09)
OpenJDK 64-Bit Server VM (build 25.252-b09, mixed mode)
[[email protected] ~]$
Ha már telepítve van, akkor kezdhetjük a Jenkins telepítését.
Telepítési lépések
1. lépés: Először nyissa meg a Parancsterminált
2. lépés: A Jenkins telepítéséhez először le kell töltenünk és hozzá kell adnunk a Jenkins GPG kulcsot:
sudo wget -O /etc/yum.repos.d/jenkins.repo http://pkg.jenkins-ci.org/redhat-stable/jenkins.repo
[[email protected] ~]$ sudo wget -O /etc/yum.repos.d/jenkins.repo http://pkg.jenkins-ci.org/redhat-stable/jenkins.repo
--2020-06-21 04:29:52--  http://pkg.jenkins-ci.org/redhat-stable/jenkins.repo
Resolving pkg.jenkins-ci.org (pkg.jenkins-ci.org)... 52.202.51.185, 64:ff9b::34ca:33b9
Connecting to pkg.jenkins-ci.org (pkg.jenkins-ci.org)|52.202.51.185|:80... connected.
HTTP request sent, awaiting response... 200 OK
Length: 85
Saving to: ‘/etc/yum.repos.d/jenkins.repo’

/etc/yum.repos.d/je 100%[==================>]      85  --.-KB/s    in 0s

2020-06-21 04:29:54 (2.61 MB/s) - ‘/etc/yum.repos.d/jenkins.repo’ saved [85/85]

[[email protected] ~]$
3. lépés: A Jenkins GPS-kulcs letöltése és hozzáadása után importálja a Jenkins GPG-kulcsot:
sudo rpm --import https://jenkins-ci.org/redhat/jenkins-ci.org.key
4. lépés: Frissítse a CentOS-csomagokat
sudo yum update
[[email protected] ~]$ sudo yum update
Last metadata expiration check: 0:17:09 ago on Sun 21 Jun 2020 04:21:20 AM PDT.
Dependencies resolved.
Nothing to do.
Complete!
[[email protected] ~]$
5. lépés: A centos csomagok frissítése után készen állunk a telepítésre, Jenkins:
sudo yum install jenkins
[[email protected] ~]$ sudo yum install jenkins
Last metadata expiration check: 0:19:26 ago on Sun 21 Jun 2020 04:21:20 AM PDT.
Dependencies resolved.
===============================================================================
 Package          Architecture    Version               Repository        Size
===============================================================================
Installing:
 jenkins          noarch          2.235.1-1.1           jenkins           63 M

Transaction Summary
===============================================================================
Install  1 Package

Total download size: 63 M
Installed size: 63 M
Is this ok [y/N]: y
Downloading Packages:
jenkins-2.235.1-1.1.noarch.rpm                 172 kB/s |  63 MB     06:16
-------------------------------------------------------------------------------
Total                                          172 kB/s |  63 MB     06:16
Running transaction check
Transaction check succeeded.
Running transaction test
Transaction test succeeded.
Running transaction
  Preparing        :                                                       1/1
  Running scriptlet: jenkins-2.235.1-1.1.noarch                            1/1
  Installing       : jenkins-2.235.1-1.1.noarch                            1/1
  Running scriptlet: jenkins-2.235.1-1.1.noarch                            1/1
  Verifying        : jenkins-2.235.1-1.1.noarch                            1/1
Installed products updated.

Installed:
  jenkins-2.235.1-1.1.noarch

Complete!
[[email protected] ~]$
6. lépés: A Jenkins indítása a systemctl-n keresztül
sudo systemctl start jenkins
Mivel a systemctl nem jeleníti meg a kimenetet, így az alábbi paranccsal ellenőrizheti az állapotot. Ezzel a paranccsal ellenőrizheti, hogy Jenkins aktív-e vagy sem.
sudo systemctl status jenkins
[[email protected] ~]$ sudo systemctl status jenkins
[sudo] password for etoppc.com:
● jenkins.service - LSB: Jenkins Automation Server
   Loaded: loaded (/etc/rc.d/init.d/jenkins; generated)
   Active: active (running)
     Docs: man:systemd-sysv-generator(8)

Jun 20 11:15:22 localhost.localdomain systemd[1]: Starting LSB: Jenkins Automa>
Jun 20 11:15:23 localhost.localdomain runuser[1456]: pam_unix(runuser:session)>
Jun 20 11:15:33 localhost.localdomain jenkins[1433]: Starting Jenkins [  OK  ]
Jun 20 11:15:33 localhost.localdomain systemd[1]: Started LSB: Jenkins Automat>
Jun 21 04:23:04 localhost.localdomain systemd[1]: Stopping LSB: Jenkins Automa>
[[email protected] ~]$
7. lépés: A port konfigurálása (opcionális)
Alapértelmezés szerint a Jenkins 8080-as porton fut, és ezt a portot bárhonnan elérhetővé kell tennünk (csak ha nem elérhető). Nyissuk ki a kikötőt,
sudo firewall-cmd --permanent --zone=public --add-port=8080/tcp
[[email protected] ~]$ sudo firewall-cmd --permanent --zone=public --add-port=8080/tcp
success
[[email protected] ~]$
A port újratöltése után a tűzfalat a
sudo firewall-cmd --reload
[[email protected] ~]$ sudo firewall-cmd --reload
success
[[email protected] ~]$
Jenkins konfigurálása
A Jenkins telepítése után a 8080-as porton fog futni. Állítsuk be kedvenc böngészőnkben a http://localhost:8080 címre navigálva.
1. lépés: Látogassa meg http://localhost:8080
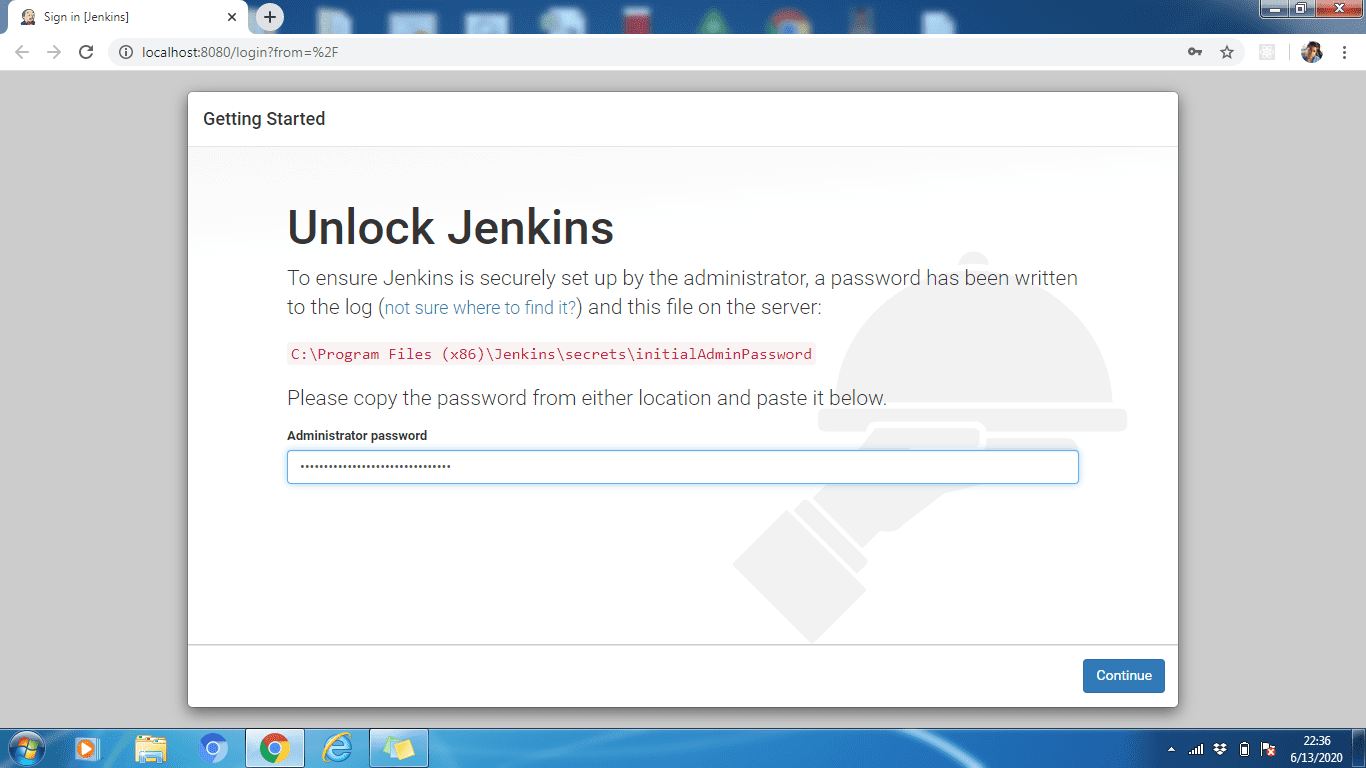
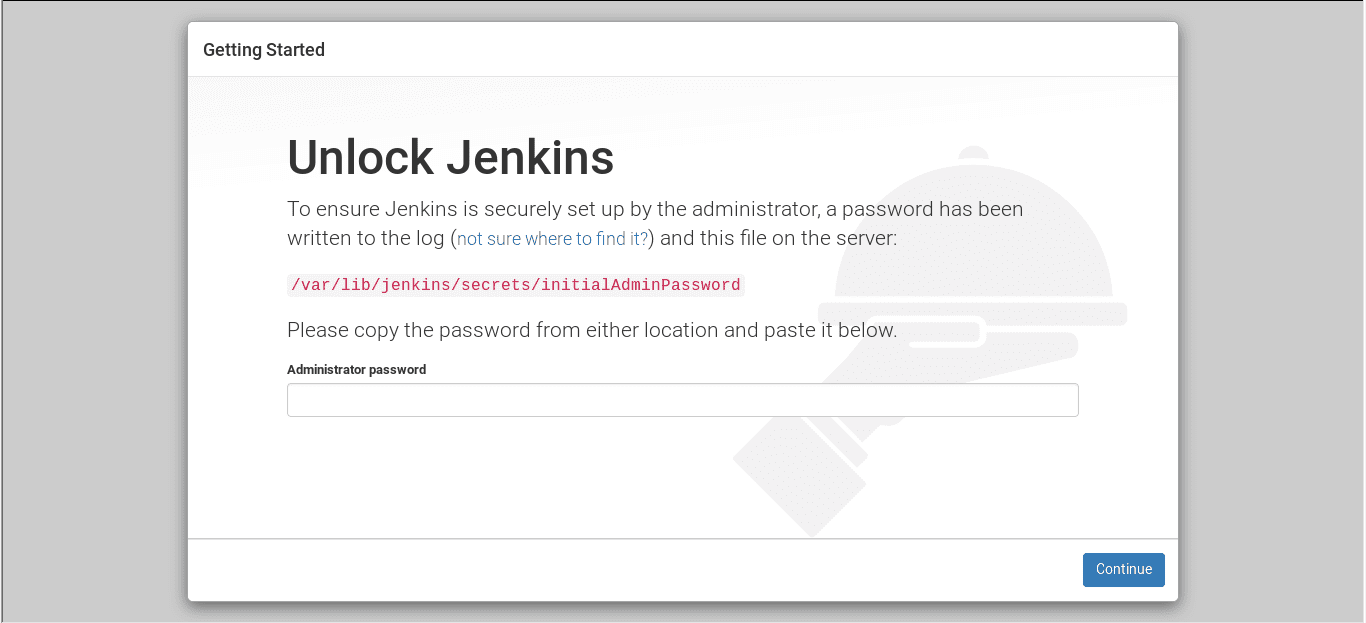
2. lépés: A Jenkins zárolásának feloldásához másolja ki a rendszergazdai jelszót a címen található fájlból
C:Program Files (x86)JenkinssecretsinitialAdminPassword
/var/lib/jenkins/secrets/initialAdminPassword
Most illessze be a Rendszergazda jelszó terület. Ezután kattintson a Folytatni gomb.
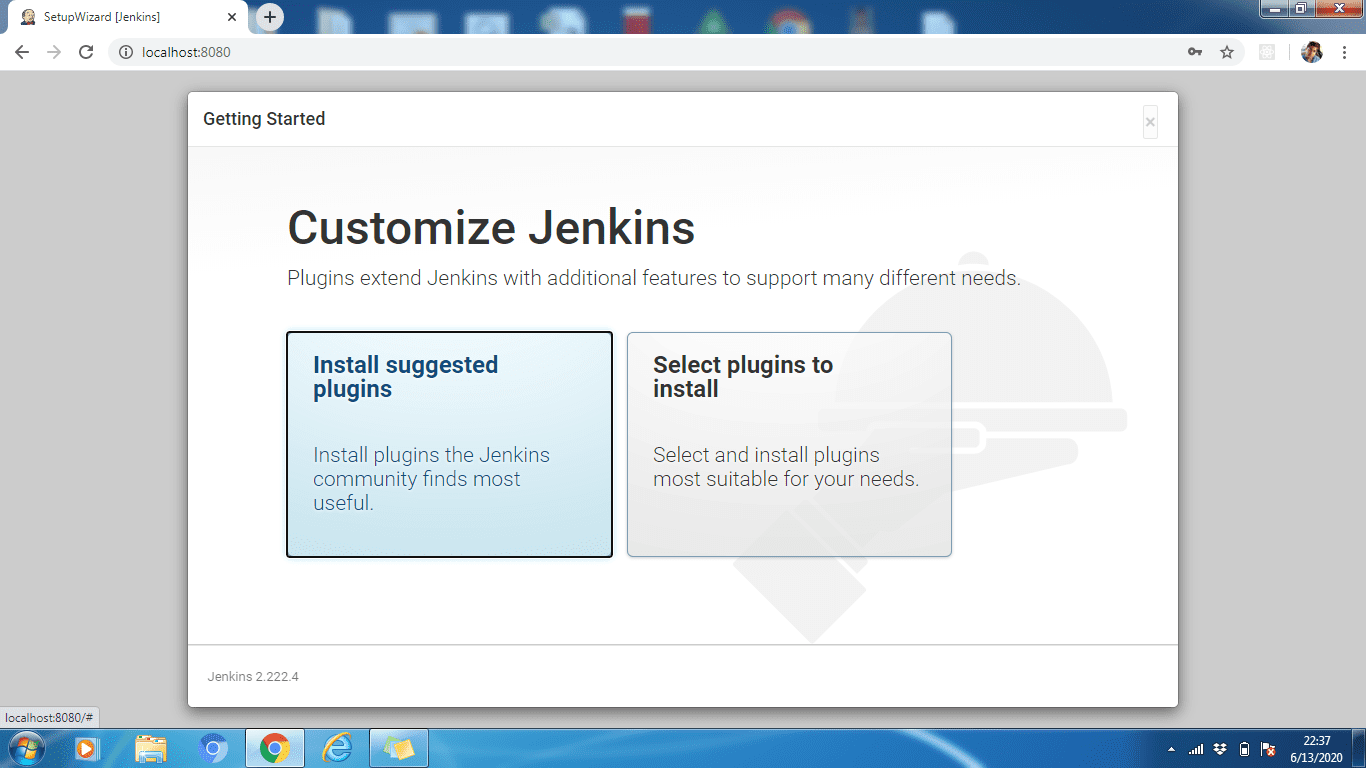
3. lépés: A javasolt bővítményeket telepítheti, vagy kiválaszthatja a beépülő modulokat a használati esettől függően. Itt telepítjük a javasolt bővítményeket.
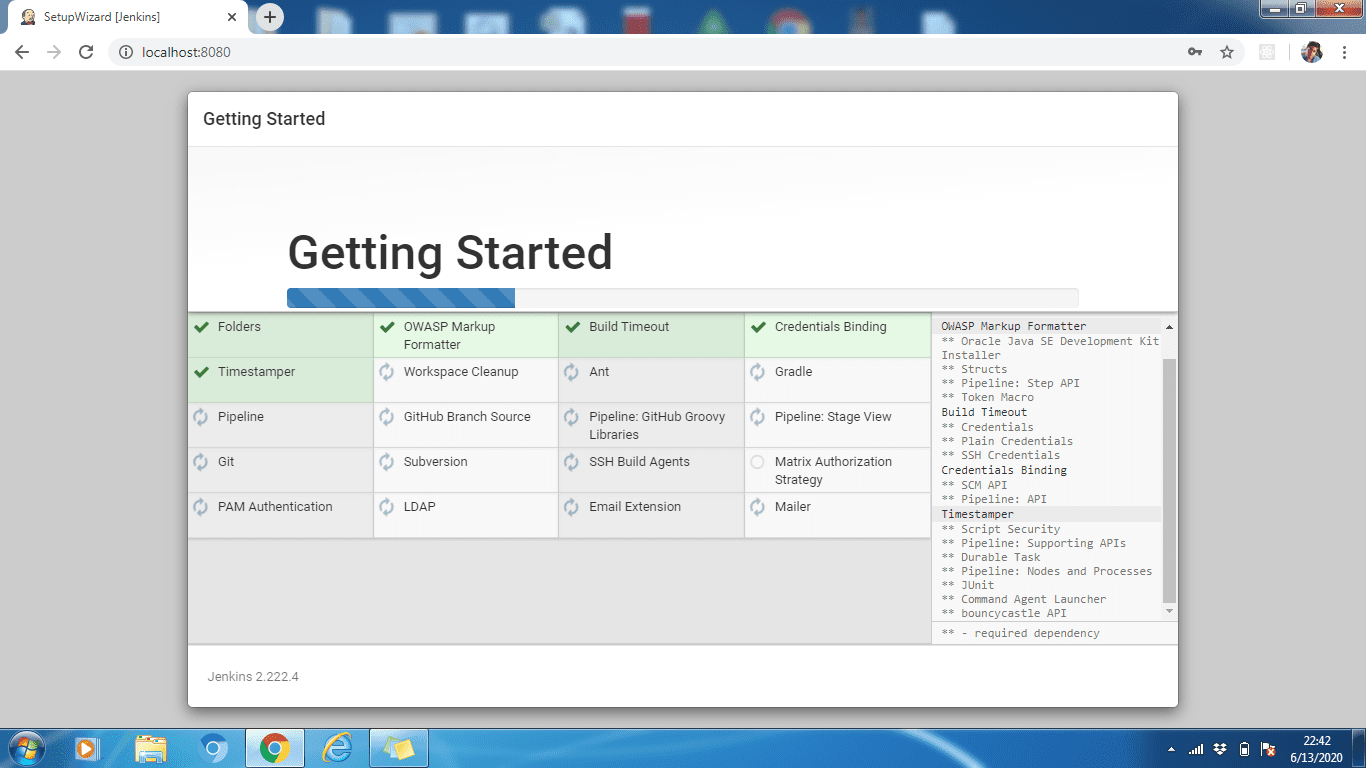
4. lépés: Várjon, amíg az összes beépülő modul telepítésre kerül. Ha a telepítés befejeződött, kattintson a Folytatás gombra.
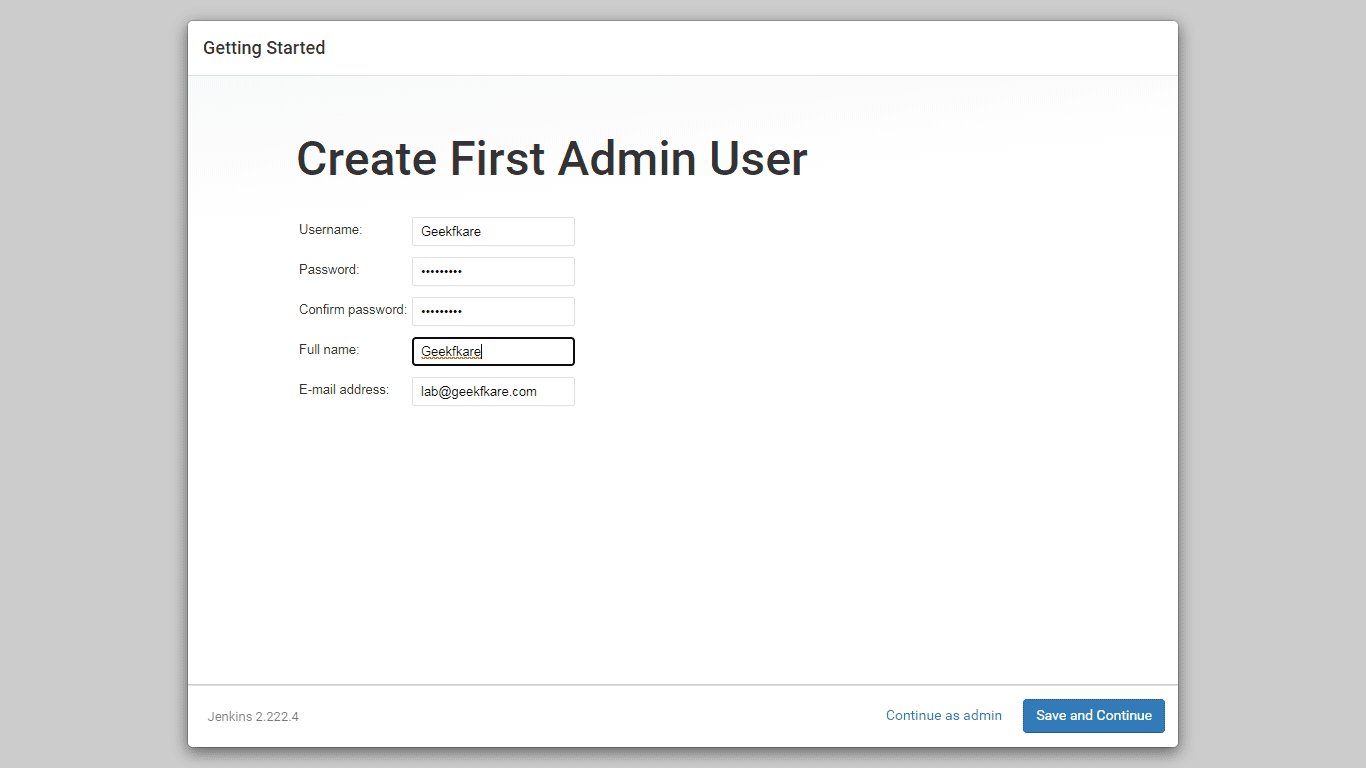
5. lépés: Hozzon létre egy adminisztrátori profilt a Jenkins számára. Adja meg a szükséges adatokat, majd kattintson a Mentés és folytatás gombra.
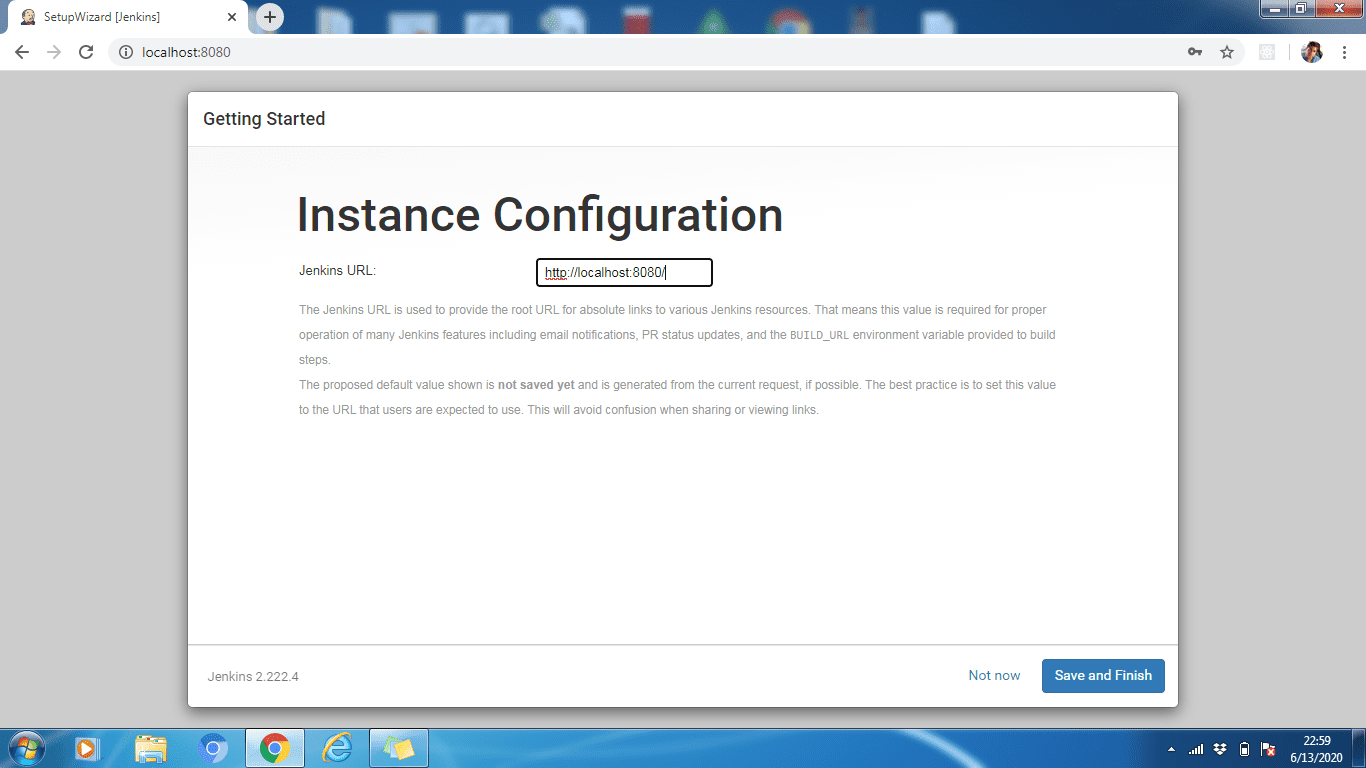
6. lépés: Szükség esetén módosíthatjuk a Jenkins URL-t, maradjon az alapértelmezett http://localhost:8080. Kattintson a Mentés és befejezés gombra a konfigurációs folyamat befejezéséhez. Most kattintson a Jenkins használatának megkezdése elemre

Végül a konfigurációs folyamat megtörtént, és a fenti az alapértelmezett, Üdvözöljük a Jenkinsben! oldalon.
A Jenkins konfigurációs lépése minden operációs rendszernél hasonló, kivéve a 2. lépést, ahol le kell kérnünk és be kell írnunk a rendszergazdai jelszót. Ez a jelszó lekérhető a fájlból, amelyet a Jenkins UI feloldásához megadott elérési útvonalon tárolhat.
Következtetés
Tehát a fenti lépések a Jenkins telepítésének lépései voltak kedvenc operációs rendszerére. Ezután tanulja meg, hogyan hozhatja létre első Jenkins-csővezetékeit.
A Jenkins telepítése egyszerű, és ha a távoli csapat számára állít be, akkor beszerezhet néhány Cloud VM-et, és telepítheti saját maga, vagy használhatja a Jenkins hosting platformot.